Showing posts with label glossy accents. Show all posts

Wednesday, August 26, 2009

Michelle's sketch: Cherry Good wishes

Next up is (my personal favorite) Michelle's sketch! I case'd Okie, but used some old Basic Grey paper (with some extra distressing), PTI cs and ribbon, stickles, and glossy accents. I just LOVE this card. It's just "cool" IRL. Wish you could see it!

Enjoy!

Kristin
Posted by Picasa

Tuesday, December 30, 2008

MFT Sketch


This was an MFT sketch that I tried the weekend before Christmas. I used some more CTMH pp's from my friend Melissa (love this paper!).
I paper pieced the tub, colored with copics and used glossy accents on the the metal parts. Then, did some sponge distressing on all the papers, including the card base. I even distressed the ribbon b/c it was a little too pink.
Enjoy!
Kristin

Monday, December 15, 2008

SCS Blogger 3 Challenge 2


Our newest Blogger challenge was a "Flap Card" either with a Christmas theme or a summer holiday.

As you can see, I picked Christmas!

I used some textured Bazzill red cs as my base and the same kind, but in green, as the accents/mats. The pp and ribbon I bought last year after Chrismtas when it was on sale.

I stamped the penquin in CTMH black, paper pieced his hat and scarf from the same red cs. I colored his beak and feet with copics. I used stickles on the trim of the hat and pom pom, then covered it with glossy accents (after the stickles had dried).

I used my cricut to cut the 2 circles to layer and pierced the image.


On the inside I used rub ons that matched the paper on the outside.

I glued the ribbon on the bottom part of the flap, so that when I tied it the card would stay closed.


TOMORROW, the voting will begin!

I'll post the link here on my blog.


Enjoy!

Kristin


Tuesday, October 28, 2008

Hmmm, like it, like it not...


Just don't know about this one. I was wanting to do some paper piecing with Balloonabella's dress, and trying to do something that would look cute. I colored her with copics, balloons too, and put glossy accents over them. I used the threading water punch at the bottom of the card to go along with bottom shape of her dress.
Had the paper and flowers forever (flowers are Paper studio).
What do YOU think??
Enjoy!
Kristin

Friday, September 19, 2008

Emma's birthday invites

So, my daughter is almost 2 (I REALLY don't know how that happened!!) and we're going to throw a small party for her next month. Unlike Jake, she's not that interested in TV, or toys- except for the one Jake has at any given moment. But, she DOES like Elmo. So, I decided to do an Elmo party... my problem- nothing Elmo!

Also, I don't want to spend a lot of money, so I used some random cs I've had for a year or so, the Celebrations cartridge from my cricut, and a borrowed stamp from a friend. I had gotten some birthday stamps a few months ago, so I knew I could use those too (getting very resourceful in my current financial state!).

This is what I came up with...

I let the cricut actually cut out the cards with the #2 in it! Then, it cut out all the scalloped square/rectangle image. I stamped them and added stickles to the star and glossy accents to the bows. On the inside I stamped the "For, Date, Time, etc" AND stamped the info (her name, the actual date, etc).


But, I found a great stamp on sale when I was at HL... got it for $3!! Now, I can sell it (anyone need an elmo stamp??)... So, I stamped Elmo on red paper in black ink, colored the eyes and mouth and cut them out and glued to the inside of the card. Heeeeeeerrrrrreeeee's Elmo:


Enjoy!

Kristin


Thursday, September 18, 2008

Sympathy

A woman I worked with for many years at my last office lost her mom last week. She was diagnosed with cancer in early August and passed away so quickly. Lisa and I felt so badly for her, so as soon as I heard, I went home and made her a card. I didn't use traditional colors, but wanted it to have a soft feel to it. I used one of Lauren's sketches.

I used PTI Lavendar moon for the cs base and polka dot ribbon. I also used it for the circl bases for the flowers and stamped sentiment. The flowers are CTMH Friendship Blessing in garden green. Then, I used my blender pen to fill them in. Put some stickles in the center and let dry. Covered the entire image with glossy accents and let dry. Then, I cut them out and glued onto the PTI cs. The sentiment is CTMH Say it in Style... just simple and not overwhelming. You can't tell in the pic, but the ribbon is a bit longer than the card and cut to look like a bookmark at the bottom. The flowers/circles are popped up for some dimension. The plaid paper was bought at J's last year for the kids' Easter pages.
Enjoy!
Kristin

Monday, September 15, 2008

Cute Cricut Cakes

Good morning all!


I wanted to show what I did for Lisa's son's birthday invites. He's turning 1 this week (how does that happen!!) and she wanted me to cut something out from the cricut that would go with his invites.


I decided to cut the cake with 1 candle (Doodletype or Celebrations- can't remember now), but also I cut out the blackout version and layered them together. On top, I put the glossy accents for the icing and stickles on the flames of the candle. They looked so cute and the invite was awesome!!


Here's the cake

Enjoy!

Kristin

Tuesday, September 2, 2008

Great card!!

So, Sunday afternoon I am browsing some blogs and reading one of my favorites... Lauren's. I'm just going through the post and seeing some of her great creations and I saw the last card of that post and just HAD to make my own version of the card.

Here's her version and here's mine...

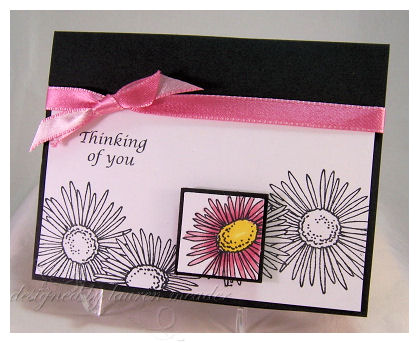
Her's was black and white (and sorry about the fuzzy image)... but I don't seem to have black cs in my stash. But I do have chocolate PTI cs, and chocolate ink from CTMH. The flower is from Love in Bloom set, I used watercolor pencils and my blender pen (good technique to try, btw). Then, Glossy accents over the center and stickles on all the "dots" of the flower. Random pink grosgrain ribbon and the sentiment goes under the bow on the left... I'll wait till I know who's getting the card.


here's a closeup of the flower:

This seriously took me only about 20 minutes (and that was the coloring, glossy accents, and stickles). I will be making more of this version for sure!!
Enjoy!
Kristin


Tuesday, August 19, 2008

I "love" this page

I did this page over the weekend in a couple of hours (maybe less?)... no real sketch, just found a picture I wanted to scrap, started matching colors, and away I went.


I LOVE the glossy accents on this... it's on the flower at the bottom right and on the words: live laugh love (they looked like they're stamped with paint, so I wanted to give them dimension).


The papers are from StoryTellers Club (and embellishments). The burgandy & black cs are OT stack. I added a bit extra ink using Ranker Ink distressing ink- frayed burlap and vintage photo. Stickles for a little bling.

Here's a close-up of the flower with the glossy accents...

Enjoy!

Kristin


Monday, August 18, 2008

One of my favorite cards!!

Morning all!!!


Well, finally I get to show you this fabulous card that I made from susiestampsalot sketch on August 12th. I really liked her card, but had no idea how to do the "ticket punch" look (on the smaller image panel) without a ticket punch.


No, I did NOT go buy a new punch!! :-)


I became inventive... you should try it-haha!


I actually used a corner "fancy" punch... turned it over and stuck a corner in on one side and ta-da... out came a ticket punch look.


First, the stamp is MFT "Take a Break"... I got it at that stamp store for a few dollars (where I got the Stamping bella images). I colored it with my copics, then used green stickles on the leaves and glossy accents on all the metal parts... looks great in real life!! I used pop-dots and adhered it to white cs, matted with chocolate PTI cs. The "pink/peach" color is PTI Berry Sorbet (as is the polk dot ribbon). The green cs is from that OT stack I've mentioned before. The card base is the same PTI chocolate cs (LOVE that stuff!!).

It's just a great card... simple and elegant!

Enjoy!

Kristin

Saturday, August 16, 2008

Good Luck

After work on Friday, Lisa and I met up with some old friends to wish "Good Luck" to a young woman going off to college on Monday (and Tech, no less--- Go Red Raiders!). I am super proud of her and know she can accomplish anything she wants.


I wanted to make her a cute card, but my fave thing is the silver brad I matched to the paper/ribbon with green stickles (it has a fancy name but I can't remember and it's in the other room... lazy me) and then topped it with glossy accents after the stickles dried so it'd be smooth like a brad. Awesome!! Great idea from Melissa at CTMH.


Have a great day!

Enjoy!

Kristin

Sunday, August 10, 2008

Fun Card


So, I wanted to use one of my birthday gifts... a stamp set called Friendship Blessings (thanks Lisa!!). It is one of the best sets I've seen from CTMH... but it's not in their current catalog.


I used some of my PTI paper and ribbon (Lavender Moon) along with DCWV glitter stack paper. The fun thing about this card is you can do the 2-step stamping b/c the set has the solid flower or leaf as a separate stamp from the outline flower or leaf.

I used glossy accents on all the "dots" around the flowers and stickles on the "F" in friendship and the centers of the flowers.

Sometimes it's good to just do a card for fun and inspiration!

Enjoy!

Kristin

Wednesday, August 6, 2008

celebrate birthday continues...

Well, you've seen lots of birthday cards lately, but tomorrow you'll get a scrapbook page!


Today, though, is ANOTHER bday card (although b/c it only says "Celebrate" you can pretend it isn't a bday card if that makes you feel better, lol!)


I am pretty sure I know who the recipient of this card will be, but no telling yet (in case I change my mind!).


This was made with a .cut file from Capadia Designs- it is a standard card size with the scallops and punched holes (nice, huh). I actually used it twice- once for the blue cs that is the card base and again on the DCWV b&b printed paper that is glued to the top.
The paper is itself is so glittery and pretty, I couldn't figure out what to do next. I had seen on several blogs the idea of stamping onto vellum and then coloring it with copic markers. So, that's what I did. It turned out great! To make the butterfly look like it was flying I stamped it on a pink cs that matches the paper and only glued the body down. I took my *new* Glossy Accents onto a couple of spots on the wings for shine. Finally, I stamped the sentiment from my *new* stamp set and ink pad and went over it with the G.A. too. I matted it and was done.
Enjoy!
Kristin

Sunday, August 3, 2008

you say it's your birthday, da nah nah nah nah nah

it's MY birthday TOO yea, da nah nah nah nah nah...


That's right, today I am OLD (er) than yesterday! Really weird to be "this" old, b/c when you are 10, 16 years seem old. When you are 16, 21 years seems old but 25 or 28 seems REALLY old. Then, you are in your twenties and ANY number over 30 is almost too old to think about. And I am in my middle 30's, wow. Where did the time go??


But here's what is great (and funny) about life. My 30's have been far better than my 20's (and my teen years couldn't even hold a candle to my 20's). So, for that I am blessed! God has been very good and faithful to me.


So, I got some goodies from my friends and family, here is the first card I made with the some of the fun stuff I bought with a Joann's gift card (thanks Erica!)...


I got a "birthday" clear acrylic stamp set. It had the cupcake image (I masked it so I could stamp it in multiples) and the multi-candle image (again, used it twice, just masking the cupcakes). And, it had the sentiment as well. There was actually several sentiments and several images including the pink ink (stamp pad) that shows up well in the sentiment and middle cupcake and candles, and a clear acrylic block too. ALL that for $7!! What a steal! I also bought a "mini" acrylic block for a $1, and got some Ranger Inks Glossy Accents for $7. Only had to spend about a dollar of my own $$ (and that was mostly the tax... so I did GREAT).

The glossy accents stuff is kinda like CTMH Liquid Glass that I've wanted for a very long time (but I always wanted other stuff more) and this was essentially free for me, so I finally got it! The sketch came from Steph's stampin stuff which is actually from Taylor's cupcake challenge
I "flipped" the image (sort of) b/c my pink paper got a little messed up, and when I tried to tie my bow to hide it I tied it 'upside down' (if that makes sense)... so I just flipped everything over. I think it looks good though. The colored cs is all DCWV summer stack and the pp is DCWV butterflies and blossoms. The brown cs and ribbon is PTI.

My favorite part, though, is what I did to the candles and cupcake tops. I colored the flames with my copic marker and then added stickles for bling. I colored the sprinkles with my pink copic and then added the glossy accents. It dries to a clear, hard, raised (embossed) feeling. So, in real life this is one AWESOME card. Eventually, I'll give it away, but for now- it's my bday card to myself :-).

Enjoy!

Kristin